📐 Want to learn how to use 3D Builder?
It is one of the simplest 3D printing programs available to make basic modifications to 3D files: scaling, smoothing, cutting, hollowing…
We give you all the keys to the easiest program for preparing your files for 3D printing 👇
📖 What do you want to read?
What is 3D Builder?
3D Builder is a Microsoft program that you can download for free from the Windows store or from this link. This program is described as a multipurpose software for the handling, visualization and editing of 3D files in a wide range of formats.

It is very likely that you already have it installed on your Windows PC, as it comes by default on many computers. Whether you have it installed or not, we are sure it will be worth your while to open it and learn how to use it with us.
One problem: 3D Builder is not currently available for Mac OS, so Apple users cannot use this program.
What is 3D Builder for?
There is no single answer to this question, as 3D Builder is (as we have told you before) a multi-purpose program. This means that it is designed to be a complete software, with which we can tackle a lot of the usual tasks that someone from the 3D world has to deal with.
Now let’s name some of the things you can do with 3D Builder:
- Display 3D files
- Scale, rotate and position 3D files
- Reduce the number of triangles in a 3D file
- Change the format of a 3D file
- Combine different 3D objects to create a composition
- Repair 3D files with errors
- Split or cut 3D models
- Make holes in 3D models for resin printing
These are just some of the things you can do with 3D Builder, but the truth is that it has many more possibilities. In the following sections we will explain the features we like the most, organized in 3 different groups:
- Features to transform your 3D model: rotate, scale, move, smooth, change format, etc
- Features to facilitate the printing of your 3D model: repair errors, cut it into parts, reduce the number of polygons, hollow out parts, etc
- Features to get creative: combine models and create custom models by putting several parts together
Features to transform 3D models
In this section we will show you some of the features of 3D Builder that will allow you to transform your 3D model in different ways. We teach you how to scale, rotate, move, smooth and change the format of your 3D files
Move, rotate and scale 3D models with 3D Builder
The first thing you will want to do when you open your 3D model is to place it in a position that is comfortable for you, both to view it correctly and to be able to edit it comfortably and efficiently. Likewise, you will be able to place your 3D model in the most appropriate way for the 3D printing, with an orientation that meets your needs as we showed you in our post How does the orientation of the part affect a 3D printing?.
This first section is the simplest, since we only have to load our 3D model in any of the supported formats and, once imported into 3D Builder, click on it to display the menu of basic transformations at the bottom.
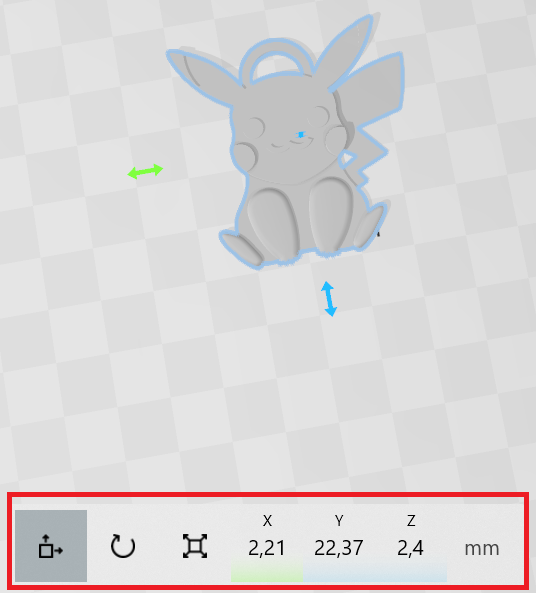
This context menu that is displayed when you click on the model has three main options:
- Move
- Rotate
- Rescale

Clicking on each of these options will change the menu on the right to show us the tools needed for each transformation: The coordinates if we want to move the object, the rotation degrees if we want to rotate it or the scale factors if we want to scale it.


Smoothing 3D models
We may want to smooth the contours of some 3D model for aesthetic or functional reasons. In 3D Builder we have a tool that allows us to perform this smoothing very easily, allowing us to make models with a very low polygon count and with sharp vertices into others that are softer and more organic.
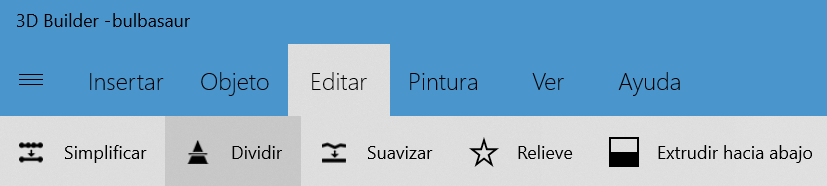
To do this we only have to click on the “edit” menu at the top and then on “smooth“.

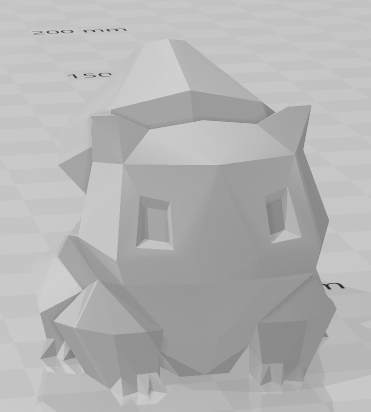
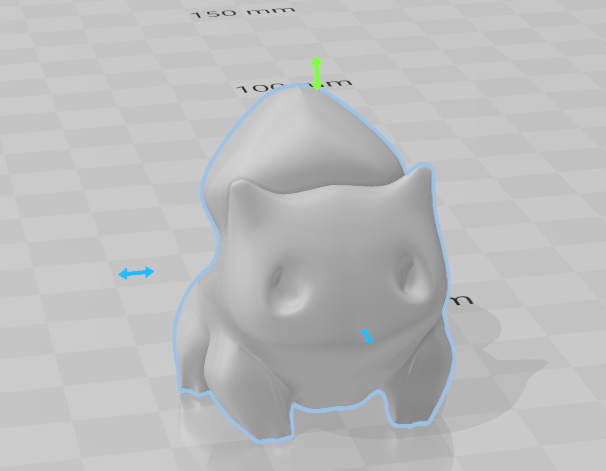
Then we only have to choose in the slider the level of smoothing that we want to apply and the transformation will be done automatically allowing us to see the result immediately. We can convert some low-poly models or with a very low amount of polygons like this pokemon into much softer and “organic” models.
Change the format of 3D models
There are a lot of 3D model formats, although probably the most used are OBJ, STL and 3MF. In other articles we already encouraged you to try the 3MF format, since it is quite superior to STL but much less popular. There are many advantages of changing the format to a more modern format such as 3MF, for example:
- It makes your files take much less space most of the time, although it depends on the geometry of the model.
- Each independent part of the model is saved as a separate object, allowing you to import it into your favorite laminator and treat each part separately.
- The 3MF format does not allow you to save invalid files, such as files with “broken” polygons and other errors, so you can be sure that the exported file will be completely valid.
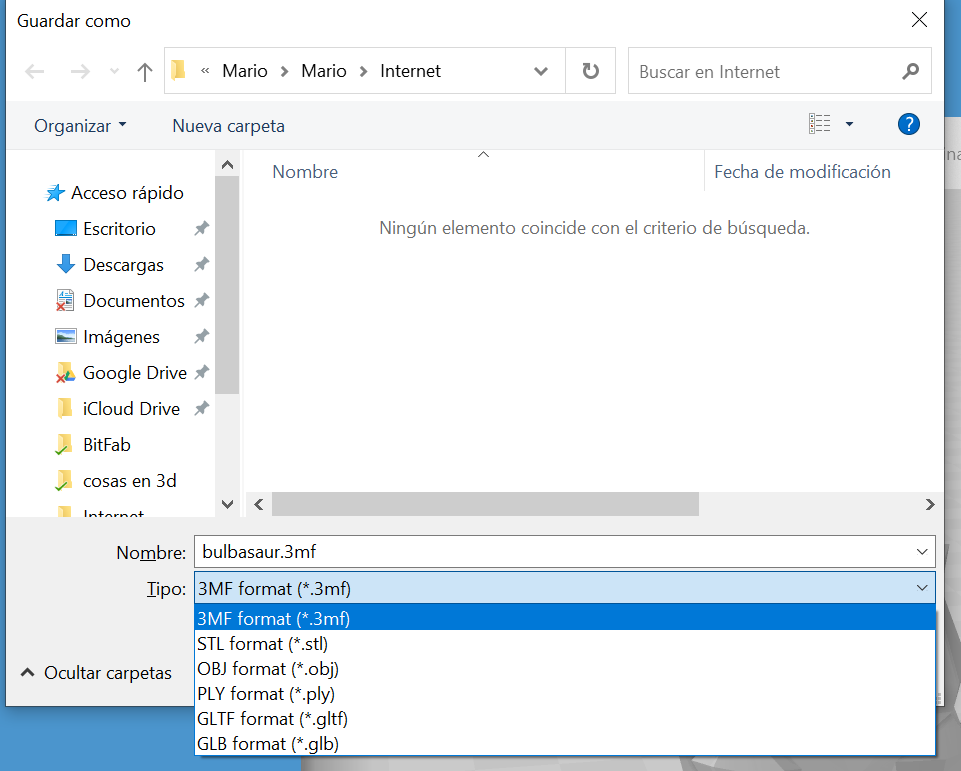
To make this format change we will only have to import the model as in the previous sections and export it using another extension with the “save as” button on the left side of the screen.
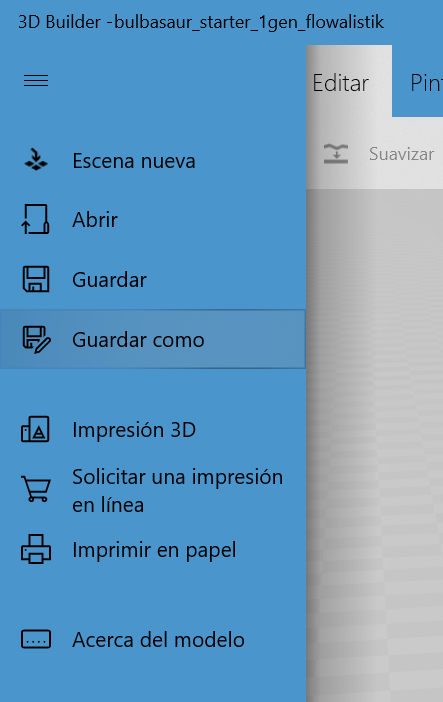
A context menu will be displayed where we can choose the desired format from a series of available options, for example, you can export to 3MF:
Features to facilitate 3D printing
As strange as it may sound, 3D Builder has one of the best 3D file repair systems on the market. It may sound strange but it is true, this free program can repair practically any 3D file with errors, fixing models that often would have to be corrected using services such as netfabb.
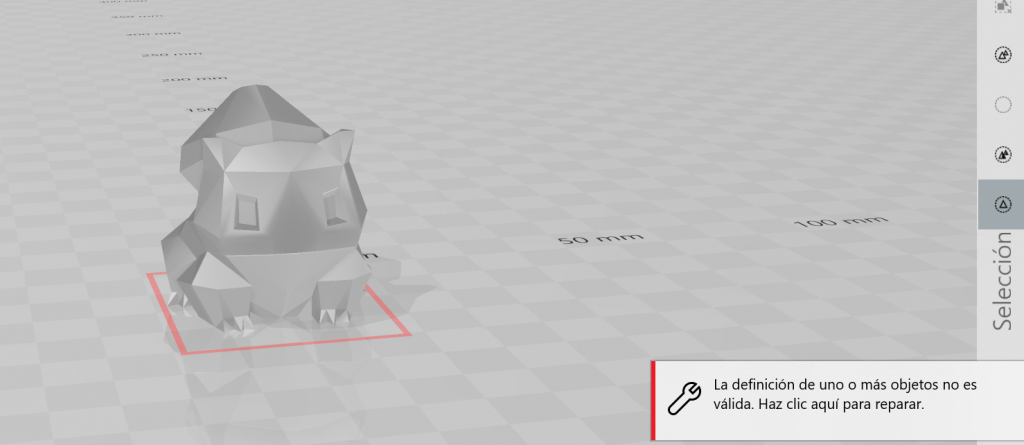
In addition, this repair utility is fully automatic, and does not require any type of intervention on our part. In fact, it is not even necessary for us to realize that the model is faulty, since 3D Builder analyzes every model we load, issuing an alert if it finds any error.
Many times these errors are not visible at first sight, and in this case a more exhaustive analysis through the already mentioned netfabb would indicate that the model has a few hundred facets inverted. This type of errors can have a wide range of consequences such as:
- The invalid file cannot be opened with the laminator.
- The file can be opened with the laminator but causes an error when laminating.
- The file is laminated but the model has artifacts or errors, such as hollow areas or deformed parts due to these errors.
To repair the errors simply click on the banner at the bottom right and they will be fixed automatically.
In addition to repairing the model, there are more things we can do to facilitate its 3D printing. Next we are going to teach you how to divide the model into pieces, hollow it out and reduce the number of polygons.
Dividing 3D models
Many times the 3D models we download include numerous elements that we may not want to include in the piece we are going to print. This may be because we want to make the printing easier or simply because we want to remove a part of the model.
In the example below we have a Harry Potter wand, more specifically the Elder Wand. This is a model that would be complicated to print as it comes, since it does not have a flat base.
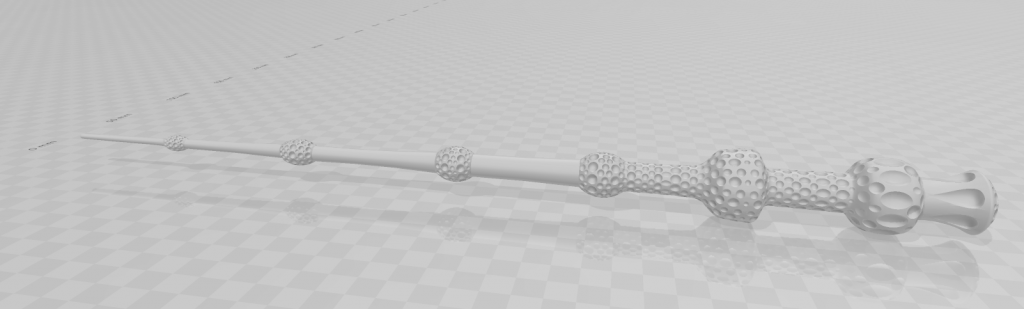
The easiest thing for this model would be to turn it and place it vertically, but it would still lack a flat base for easy and stable support on our printer bed.
For this we have the utility that allows us to divide the 3D model in different pieces. Accessing this function is as simple as clicking on the “divide” button in the “edit” menu.
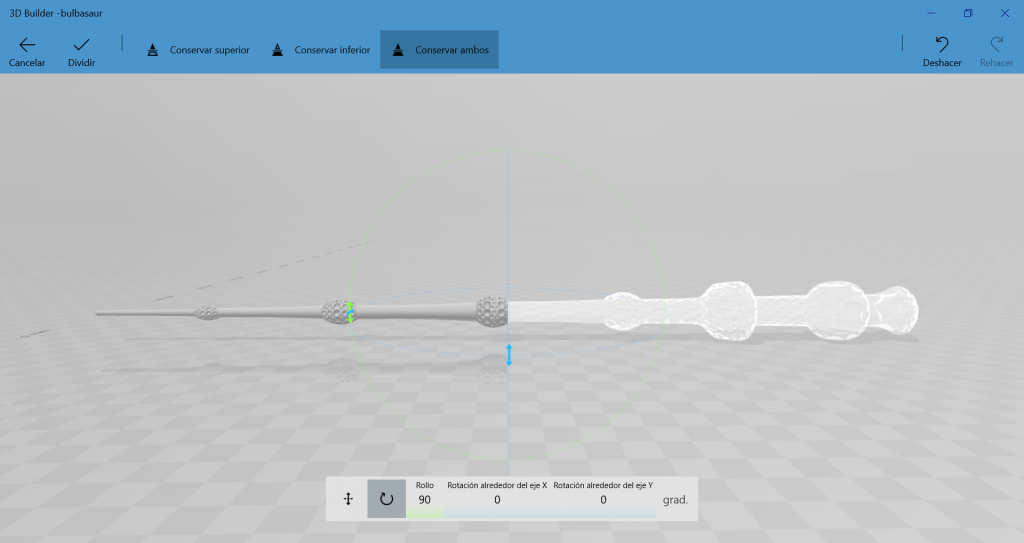
Pressing this button will open the dividing context menu, where we can choose:
- If we want to keep only the upper part, only the lower part or both. In our case we want to keep both parts after the division
- The position and angle of the plane that will define the cut, although we can also change these parameters using the arrows on the model

We must choose a plane that makes the cut we want. In our case it would be like this:
At this point we would only have to click accept and the model would be separated into two different pieces. We can export each part separately or, preferably, export the set as 3MF, thus saving a single file but containing both parts separately (as opposed to saving it as STL).
Hollowing out models
When printing models on resin printers it is essential to hollow them out to save material and reduce the stress on the FEP membrane (in the case of DLP printers). This will not only save material costs but also reduce the risk of the part sticking to the FEP instead of the base of the printer, causing a catastrophic printing failure.

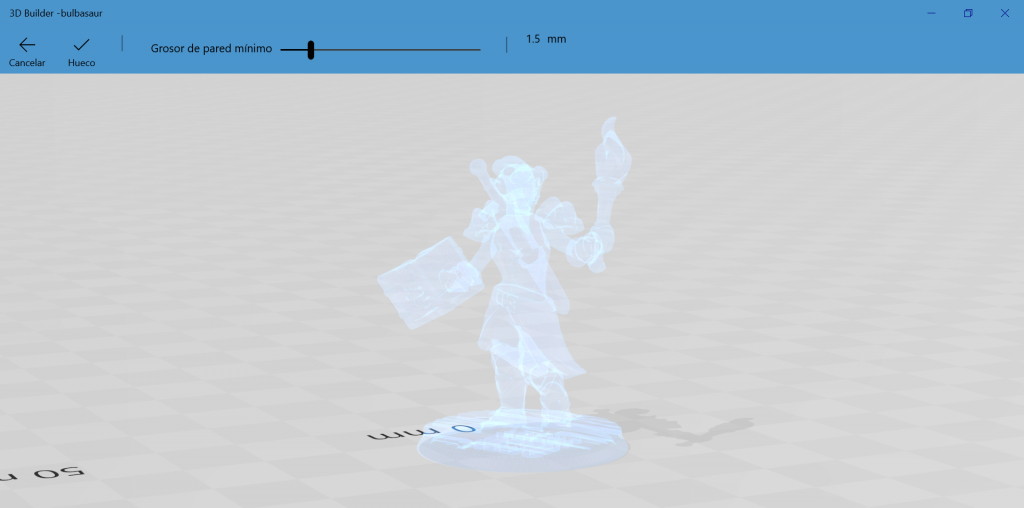
To hollow out our model, just click on the “hollow” button in the “edit” menu. When you press it, a context menu will open where you must choose the thickness of the “shell” you want to leave. For miniature prints, a thickness of between 1mm and 2mm works well.
Reducing the number of polygons in a model
It is very common that some files we find on the Internet are in a very high three-dimensional resolution. This means that it has an excessive amount of polygons, which may be appropriate for other purposes such as animation, but is counterproductive for 3D printing.

A very large model with a high density of polygons may make our laminating program unable to process it, due to the large amount of information and the complexity of the calculations required for laminating. It is also possible that it simply slows down enormously all the tasks we have to do with this model such as scaling, moving or rotating it.
We’ll give you the same wand as before, which is 20MB in size and has about 400,000 triangles, which is absolutely crazy. In this model you can see at first sight that it does not require such a high resolution, since it does not have such a complex geometry.
To reduce the number of polygons we only have to click on the “simplify” button in the “edit” menu.

The context menu will then open, where we can choose how much we want to reduce the triangles of the model. The right thing to do is to reduce the polygons as much as possible without deforming the geometry of the model, removing triangles that were not providing detail (or a detail that is not noticeable in the printed model).

At the end of the process our model will have much less triangles, being easier to process by other programs and it’ll be lighter. In this case we have gone from a file of about 20MB to a 3MB file.
Features to get creative
3D Builder allows you to do some pretty crazy things like make model assemblies to create dioramas or combine different parts into a single model.
In this aspect there is little to say, since we simply have to import all the models we want to combine and proceed to scale and move them as explained in the previous section.
We leave you a video in which you can see how you can create a unique and custom model by combining different parts in 3D Builder.
Conclusions
We showed you a lot of things you can do with 3D Builder, and how this program can be used for much more than it seems. It is a free but extremely powerful software, being one of the best in repairing damaged files.
We can’t wait to see what you can do with 3D Builder, so please share all your creations in the comments!