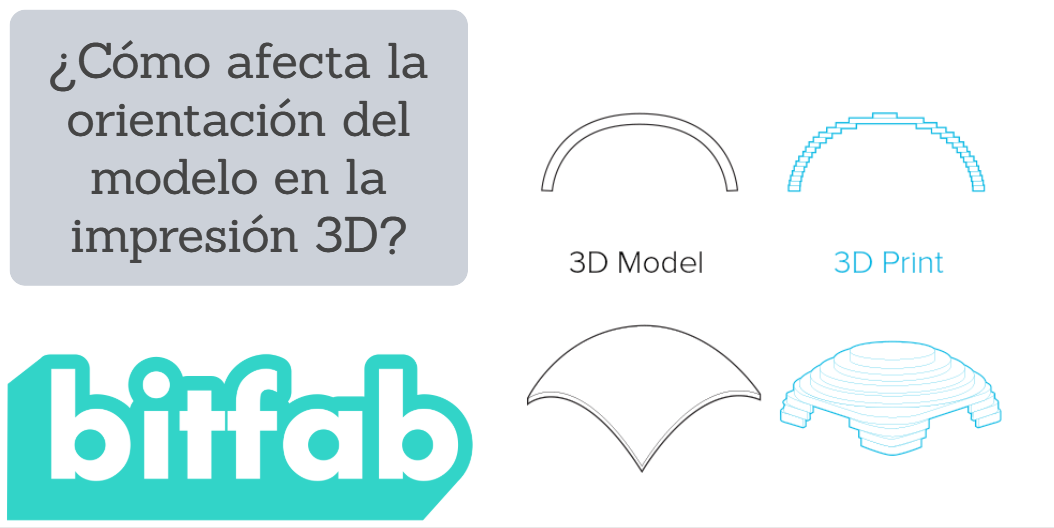
Have you ever wondered how the orientation of 3D printing influences the finish or the qualities of the part?
On some models the orientation can be very obvious, since the model designer him/herself sets it in the optimal orientation. In other cases we are not so lucky, and the model is positioned in a way that is not appropriate for its printing.
Do you want to learn how to orient your parts to get the best surface finish? Or maybe you prefer a higher resolution in certain parts of the model? Are you looking for the orientation that will maximize the model’s durability? Well, if the answer is yes, keep reading because we’re going to tell you all this and more today, at Bitfab.
📖 What do you want to read?
The importance of orientation
First of all, you may be wondering why it is important to find a proper orientation. Can’t we print a piece in any orientation? Well, technically yes, we could, but it may not be the best idea to choose an arbitrary orientation.
The orientation of the piece can have a great influence on several factors that we will explain in detail:
- The surface finish
- The “resolution” of the piece, or its level of detail
- The resistance
Depending on which section you want to focus on, you will have to choose one orientation or another. Below we will leave you with a few tips so that you can make the most appropriate decision.
Best orientation to improve the surface finish
The finish of our parts will depend mainly on two factors: the geometry of the part and the number of supports required.
We all understand that supports, although they can be adjusted to be as little intrusive as possible, will always leave some mark on our model. In turn, we can increase the unsupported overhang threshold, i.e. leave sharper overhangs without support. Depending on the layer ventilation of our printer the limit for these overhangs will be between 45 and 75 degrees.
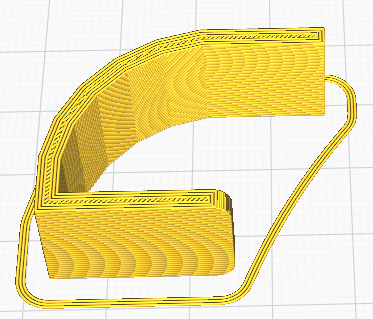
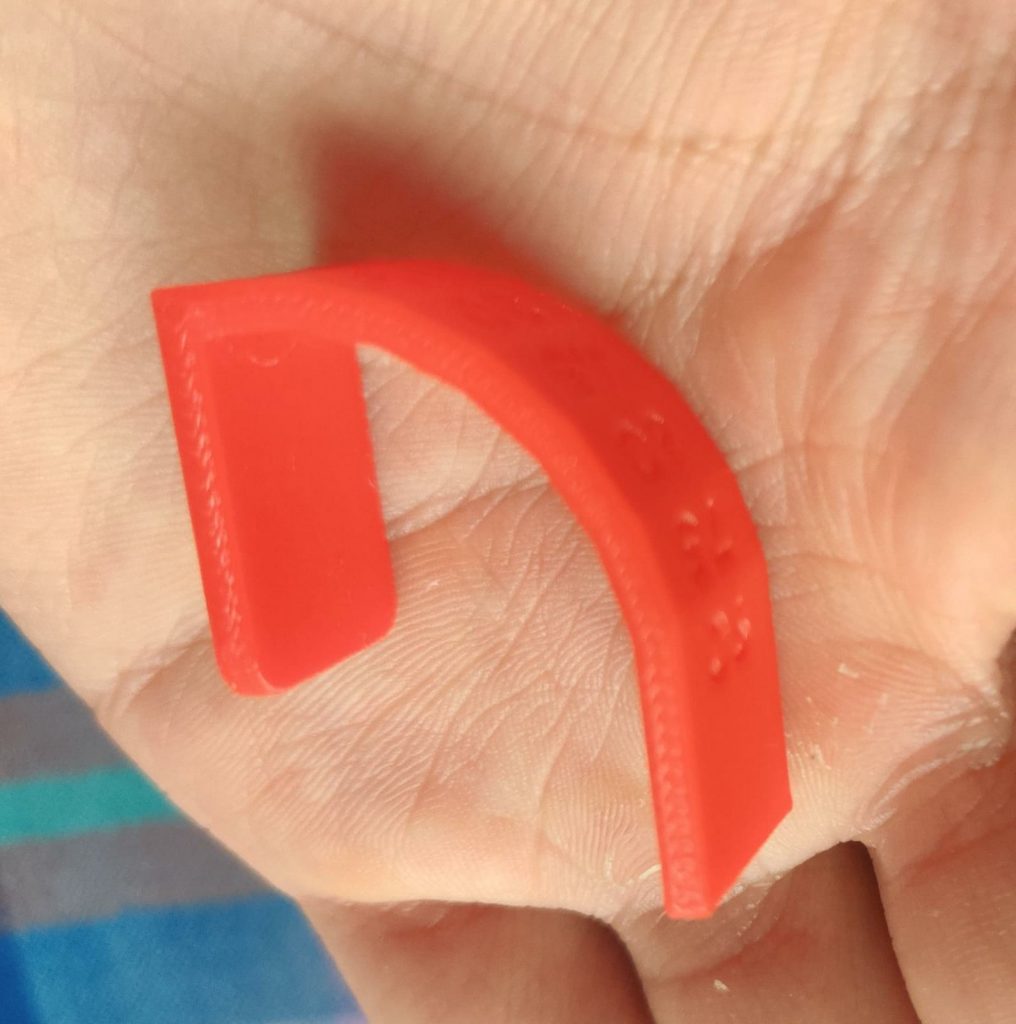
There are parts like this one that will help you find the limit angle of your printer. We will use this model to show you how proper orientation can improve the surface quality of a part by reducing or eliminating the need for supports or overhangs.
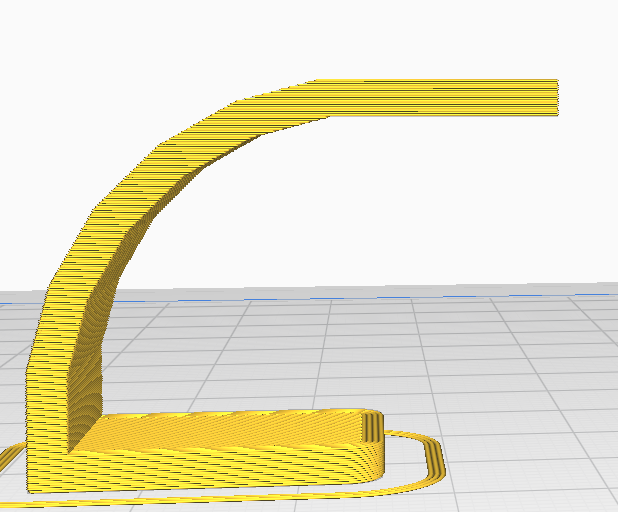
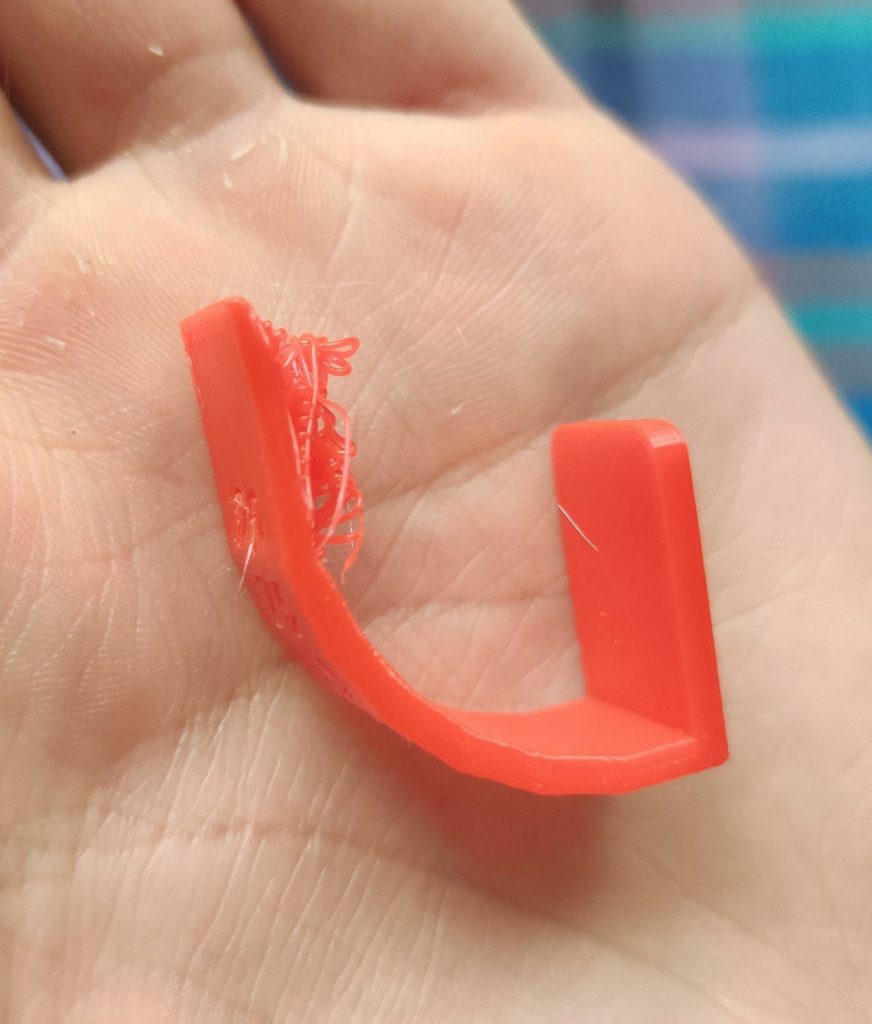
As you can see, by choosing the orientation on the left, we are forcing our piece to have very pronounced angles, which will probably need supports. Even if we don’t use supports, as we have done, the finish obtained in that area is very poor.
On the contrary, when we print the piece as seen on the left, there is no overhang, since the piece is lying down and all the walls are perpendicular to the bed, not needing supports or abusing the overhangs. You can see the results for yourself.
Best orientation to get a higher level of detail
To understand this point it is important to remember the “resolution” or level of detail that our printer can achieve in each axis.
In the XY plane, i.e. the horizontal, our printer is limited by the size of our nozzle. As the plastic is melted through the nozzle, the width of the extruded line will be approximately equal to the width of the nozzle itself. We can slightly enlarge or reduce the line width in our laminator, but it should always be close to the nozzle width.
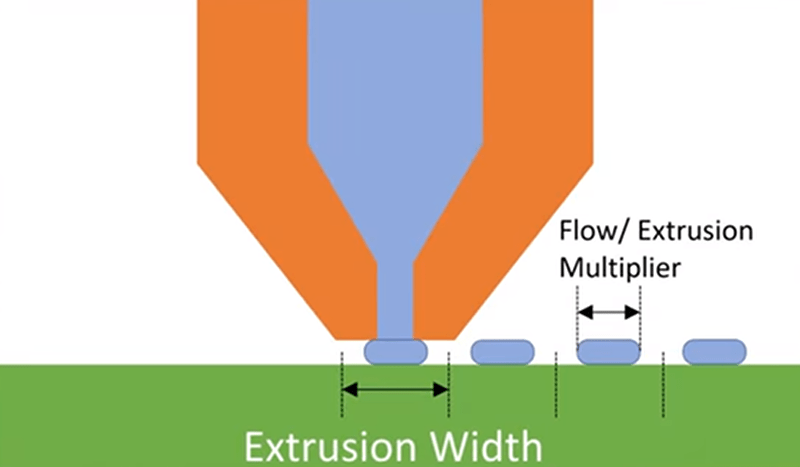
This means that a 0.4mm nozzle will not be able to print much finer lines than 0.4mm, so the resolution in the XY plane is limited by this factor. Any part of our model that occupies less than this line width in the horizontal plane will be completely omitted by the laminator, disappearing from the final model.
If you want to know more about how the nozzle size and the extrusion width affect it, we leave you a video from Prusa where they explain it very well.
In the vertical or Z-axis, the resolution will be limited by the layer height we choose. The good news is that most domestic printers can print with layer heights as small as 0.07mm, which is about 6 times more resolution than we could get in the horizontal axis with a 0.4mm nozzle.
This is why our goal is to orient the piece so that the smallest details are along the vertical axis. This may conflict with the previous point, since an orientation where details are located along the Z axis may imply a greater amount of supports so this is where we must find a compromise between both factors.
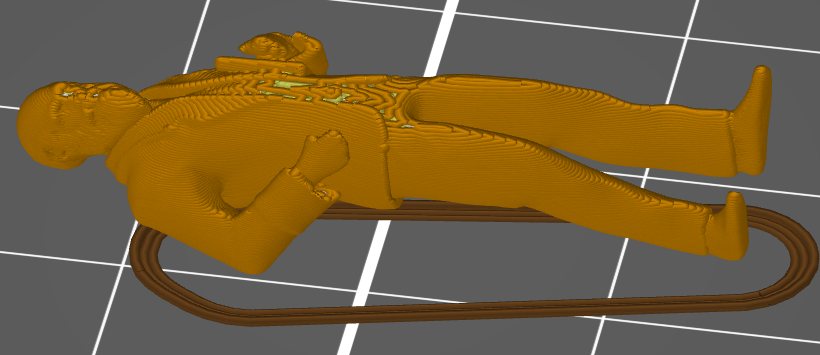
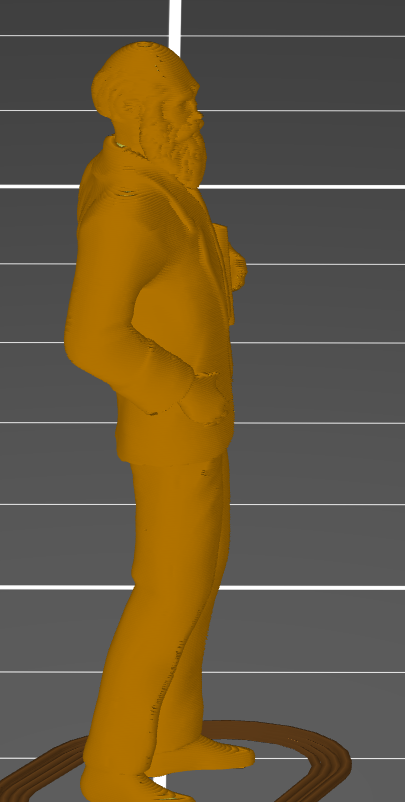
In the example we show you, we can clearly see that by orienting the model vertically, the areas with more detail such as the face or the beard retain much more detail, while they disappear completely in the horizontal model.
Better orientation to maximize resistance
3D printed parts will always be more fragile along the vertical or Z axis than in the horizontal plane. This is because the adhesion between layers is always lower than the adhesion between lines in the same layer.
If you are curious about the certainty of this fact, you can take a look at CNC Kitchen‘s Youtube channel. In many of their videos you can find comparisons of resistance between printed parts horizontally and vertically. The results vary depending on the material, temperature and other printing parameters, but as a rule the parts always tend to split between layers.
This is why to find the optimal position to maximize the resistance of a 3D model we must first think about what forces our part will experience. Once we have located the direction in which the force is going to be applied, we must orient our piece so that the force is applied perpendicularly to the layers, that is, the layers are arranged so that the force does not tend to delaminate the piece (to separate the layers).
We leave you a video of Maker’s Muse where a small study is made on the best orientation to print a piece so that it can better withstand stress in a given direction.
Conclusions
In this article we have explained some of the factors to take into account when orienting your models for 3D printing. As we like to make things clear, here is a short list with the most important tips:
- 3D printing requires supports to print certain regions with very pronounced overhangs. Try to position your model so that you minimize the need for supports, thus improving the surface finish of your parts.
- Parts printed in 3D with FDM printers always have lower strength in the Z axis (vertical) than in X or Y (horizontal). This is because the adhesion between layers is always lower than the adhesion between lines of the same layer. Orient your model so that the final part is resistant to stress in the direction that suits you best.
Now that you know these tips, are you ready to print? Leave us in the comments any doubt you may have or the models you have printed following our advice!