Warping is the public enemy number one in 3D printing, and we have been fighting it for many years. We teach you all our tricks to avoid warping and cracking in your prints, what it is, why it is produced, how to combat it and what products to use to secure your parts to the bed and prevent them from rising. No more warping! 💪
What is warping?
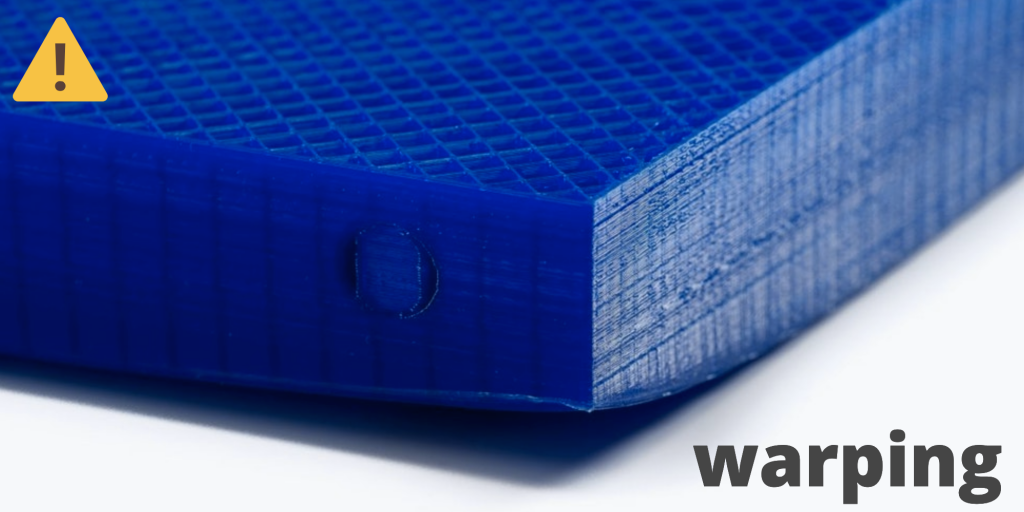
First of all, what does warping mean? Warping is the term used in 3D printing to describe when the first layer of a part is deformed and detached from the printing surface.
Warping in 3D printing shows up mainly in large parts, because it is in this type of pieces where the thermal stresses in the part become more powerful and end up pulling the part off at the corners.

What causes warping?
Do you want to know what causes warping on your parts? The cause is the contraction of the layers as they settle and cool one on top of the other. The upper layers contract and pull on the lower layers, the effect accumulates in the outermost areas of the part and that’s where they detach from the bed. I recommend this video from my favourite technical channel on 3D printing, CNC Kitchen, it’s very graphic and shows why the tension of the layers lifts the corners of the part:
What is cracking?
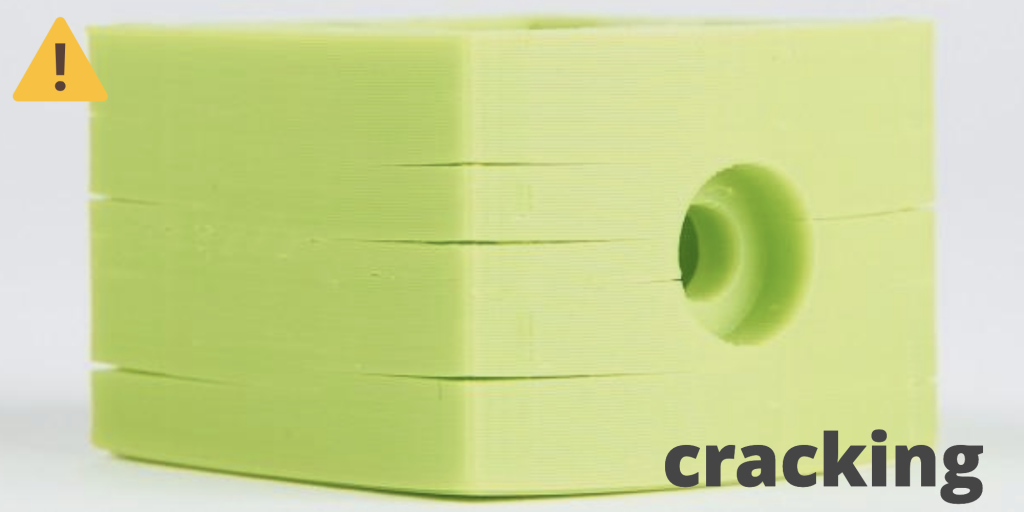
Cracking is another effect closely related to warping but that appears in the intermediate layers of the part, rather than only in the first layer. In general, if a part has cracking, the first layer will always be affected by the warping as well.

Cracking is also caused by stresses induced during cooling of the part, but this time in the intermediate layers. If our welding between the layers is not good enough, these tensions end up separating the layers and leaving horizontal cracks in our prints.
Therefore, the best tips to eliminate cracking are to keep the print volume at a higher temperature (closing the 3D printer and avoiding using it in very cold rooms) and raise the extrusion temperature a little to improve adhesion between layers.
Warping on the most commonly used materials: PLA, ABS, PETG, PP
Now comes the more technical part, how do warping and cracking affect the most commonly used 3D printing materials? We have tried quite a few of them and we can tell you about the most common ones:
- PLA. PLA is the material with the least warping that exists in 3D printing. Why? Because it has the lowest thermal expansion coefficient of all, so when PLA parts cool they shrink less than any other material. That’s why PLA is the best filament for when you want to print large pieces or those with a large contact surface with the bed, to avoid warping.
- ABS. ABS, unlike PLA, is a material very prone to both warping and cracking, as we have discussed in our article about it. To solve warping and cracking in ABS the only option is to close our printer (in a box or a suitable casing), so that the entire print volume is kept at high temperature and the parts cool down more slowly.
- PETG. PET-G is a resistant material and very suitable for 3D printing. In fact one of its advantages is to be a material with very little warping (although something more than PLA) and still more resistant than ABS and PLA. If you experience warping, follow the advice we give you in the next section.
- PP. I still remember when we had to print a set of 20cm sharp-edged cubes in polypropylene: it was impossible to keep it glued to the printing surface. The trick to avoid warping with PP is to use packing tape (which is also made of PP), so the parts are welded to the tape and it’s a little easier to make parts. It is still an odyssey to print polypropylene parts with lengths of 20cm or more.
How to avoid warping? 6 techniques
- Use a heated bed. It seems obvious, but there are still some printers without a hot bed. If this is your case, you will always have problems controlling the first layer of your pieces. If you have a hot bed and you still experience warping/cracking you can try raising the temperature of the bed 5 or 10 degrees to improve the fixation and the surrounding temperature of your pieces.
- Control the room temperature. The room temperature is the other factor that most influences warping. You need a warm environment for the parts to cool gradually and control internal tensions. What can you do to improve it?
- Print in a warm room instead of an unheated garage or office, or a room with drafts.
- Close the 3D printer with a box or casing that creates a closed environment around it.
- Recalibrate the height of the first layer (bring the head closer to the bed). One of the most common causes of warping among novice printers is that they have miscalibrated the height of the first layer. If the first layer is too high up, it will detach from the bed and warping will appear on all of our parts.
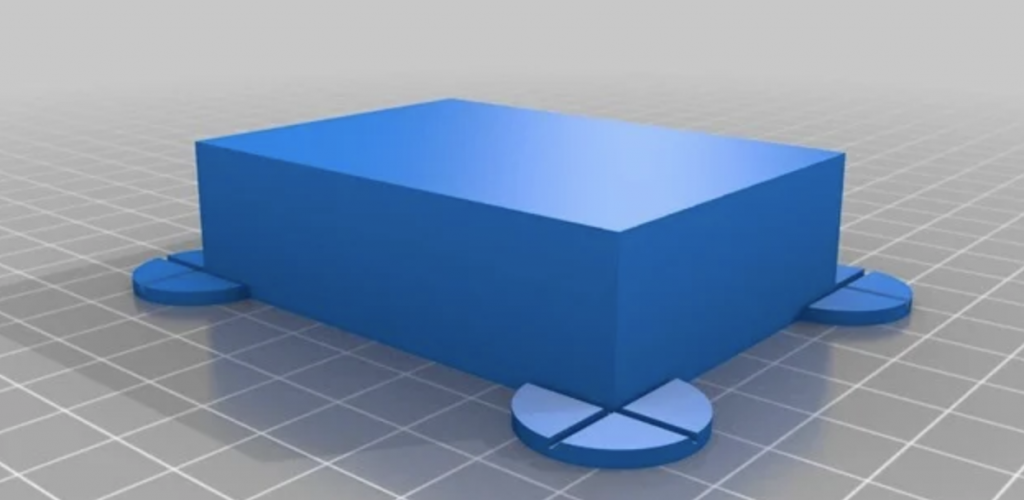
- Add brim or “ears” to our parts. Brims and “ears” work by adding surface to the part so that it remains attached to the bed.
- The brim is an edge that is added to the part from the laminator; you can configure it and reduce the chances of your part lifting away from the bed.
- The “ears” are what I call a type of design that is added to the corners of the parts to avoid warping. Here’s a photo for you to see what I mean; it’s quite common in parts optimized for 3D printing:

- Change the printing position. This trick is very good for long parts in one direction. In some of the larger parts that we have printed (40cm), when we put them along the whole bed, the warping effect was very strong and it swerved the whole piece. We had to put the piece vertically so that it was printed without being affected by the warping
- Use fixation products. All printers use a fixation product and there is always the possibility that the product you are using is not the right one for your material. Replacing it with a more powerful one may improve the results.
Products for avoiding warping
Los productos más comunes para fijar piezas, y que te pueden ayudar a mejorar el warping:
- Kapton tape
- Hairspray (the one we use)
- 3DLac
- Dimafix
- Polypropylene tape (suitable for PP printing)
Did you like the guide?
We like to bring together our experience in 3D printing so that all of you can enjoy our warping-free printing tricks. If you’ve been reading this far and enjoyed it, it’s a win for me!
If you liked the guide you can share it in social media and tell us your doubts or your opinion in the comments below.
Best regards!
Diego

